
Experience Faster Rendering in Blender Cycles with RenderPool
Blender 2.9 has made great strides in improving visuals and rendering 3D models and animations. Most noticeably, the way it visualizes OpenVDB and volume simulations. Where it was merely implemented as importable in 2.83 LTS, 2.9’s update has drastically improved the visual fidelity of voxels that allow for simulations such as smoke, fire, and explosion plumes. This is quite the game changer for Blender users.
RenderPool has realized Blender’s potential and now offers its services to users who wish to take advantage of the affordable computing power of a GPU-based cloud rendering farm when rendering in Cycles. Here is a step-by-step tutorial explaining how to use RenderPool with Cycles.
Uploading Your Blender File to RenderPool
In Blender, once you have finished setting up your scene, assigning your textures, and situating your camera, all you have to do is save your file either by going to the File menu in your toolbar and pressing the save button, or hitting Ctrl+S. If you have textures (materials that come from external locations) be sure to pack all of the files into your .blend file by turning this setting on before you save your scene.
Exporting OpenVDB Animation (.ZIP)
With Blender 2.9’s heavy upgrade to OpenVDB/volume simulation resolution, the quality has never looked better. However, volume animations don’t pack into Blender files like materials or texture maps do. When importing volume animations into Blender, chances are that they will be in OpenVDB sequences, and that means they need to be imported using a relative path.
Once you have selected your animation frames in the import dialogue box, be sure to check the Relative Path box in the far right-hand side.
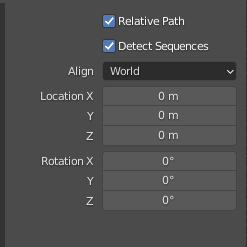
Importing as a Relative Path will allow the sequence to be opened no matter where the files are stored as long as they match the same file as written in the OpenVDB Sequence file name box.
Once saved, make sure your .blend file and .vdb files share the same folder, then compress it as a .zip or .7z archive file. This is how RenderPool will know how to render the scene properly.
How to Render in Cycles using RenderPool
Uploading your Blender scene to RenderPool is as simple as doing so with your .rpr export files. Log in to your RenderPool account and navigate to the file manager, then find the upload button.
Once you arrive on the Upload main page, you may notice in the drag-and-drop area that there are now five icons where there were only four before. That’s because you can now take your saved .blend file (or .zip/.7z file) and drag it directly into RenderPool or locate it in your file directory by pressing the “Browse Files” button in the center.
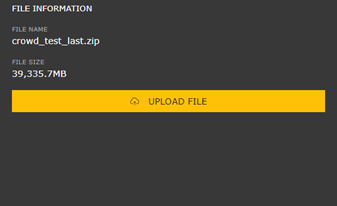
Once you have located your file, the next step is to press the yellow “Upload File” button to upload it to your file manager.
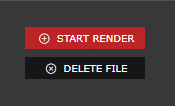
After uploading, you can proceed to the the render settings by pressing the “Start Render” button highlighted in red.
Render Settings
Once the “Start Render” button is clicked, you will be taken to the render settings page where you have the ability to select which ProRender build you wish to use, 1 or 2. You can also choose your render’s sample rate, file format, GPU processing speed, frame selection (start to end frame selection if it’s an animation) and the option to switch on Arbitrary Output Variables (AOVs). You can also switch to the Toontrace option to take advantage of RenderPool’s exclusive new technology.
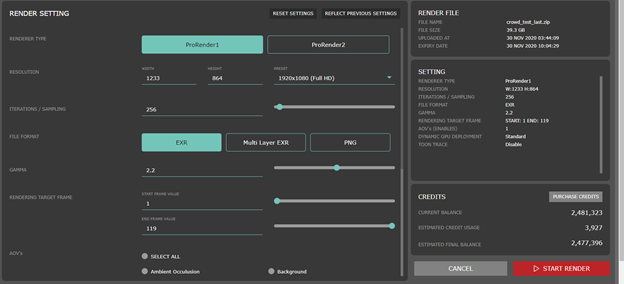
After you have set everything to your desired specifications, hit the “Start Render” button at the bottom-right side of the screen and the render will begin. Leave the rest to RenderPool!
When your render begins, you can view its progress in the Renders Manager tab under the ”Running” subfolder. Of course, the amount of time it takes to complete the render will depend on the size of your file and the parameters you have set, but it’s usually extremely quick.
When the render is complete, you will be able to download your file by pressing the “View File” button that appears on the right-hand side.
From there, press the ”Download File” button to acquire your file.

Streamline Your Blender Cycles Rendering with RenderPool
RenderPool strives to meet every designer, animator, studio, and hobbyist’s rendering needs, but as with all things, the steps to bring a scene or 3D model to life takes time. The fireball shown above was made using Blender 2.9’s more refined volume simulation framework, resulting in a larger file due to the volume simulation files packed into the .zip file — the result is a testament to RenderPool’s data management.
Though larger animation files may take a little longer than a single static image, depending on the server’s traffic, the speed in which the upload and rendering process takes in RenderPool is significantly faster than rendering on a local workstation. Many production studios regularly have large files like these in their pipeline when working on commercial projects; and due to that data constraint, RenderPool strives to be a reliable resource for even the most data-intensive creators.
RenderPool’s programmers work diligently to continually implement framework updates for many of today’s top modeling platforms, including accommodating scenes and animations produced entirely in Blender 2.9. If you’re a Blender user, try RenderPool out for yourself and see how much more efficient and beautiful you can make your projects. Happy rendering!