Usage Guide - for Blender Cycles,Eevee

Upload, render, download the output

See how Render Pool works for BlenderGenerate the file in Blender and upload to Render Pool from your browser.

Rendering is mostly done with the blend file’s settings.

Use a .zip file and it will render with textures, etc.

Eevee’s process is the same as that of Cycles.
Download our Sample Project File for Blender on better understanding on how to have linked assets, cache to work.

Render Pool Manual for Blender

Render Pool Tutorial Videos

Blender Cycles Render Pool Video Part 1

How to set up in Blender scene before using Render Pool

Blender Cycles Render Pool Video Part 2

How to render on Render Pool

Render Pool Quick Manual

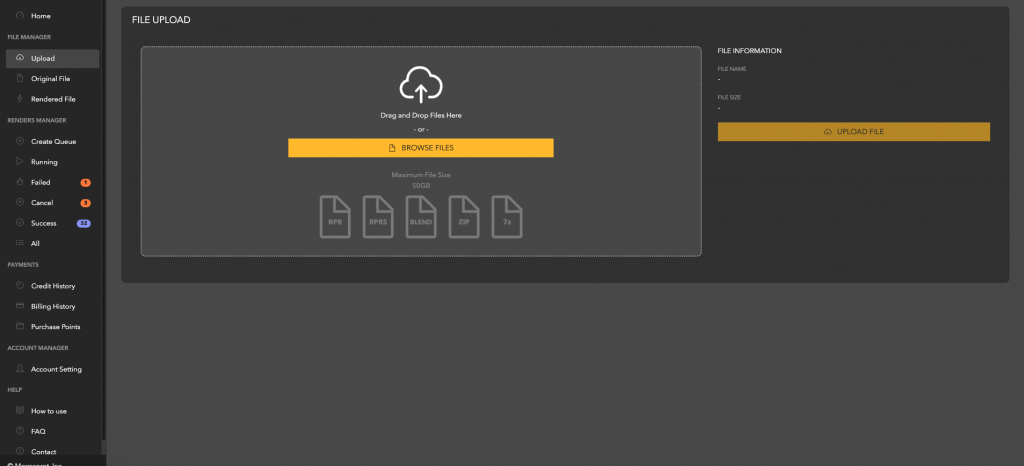
1. Upload Files

Click Upload in the menu, and drop in the prepared file.

For Blender Cycles, upload a .blend or .zip file.


*To put textures, etc. into a blend file, check below.

2. Set rendering parameters

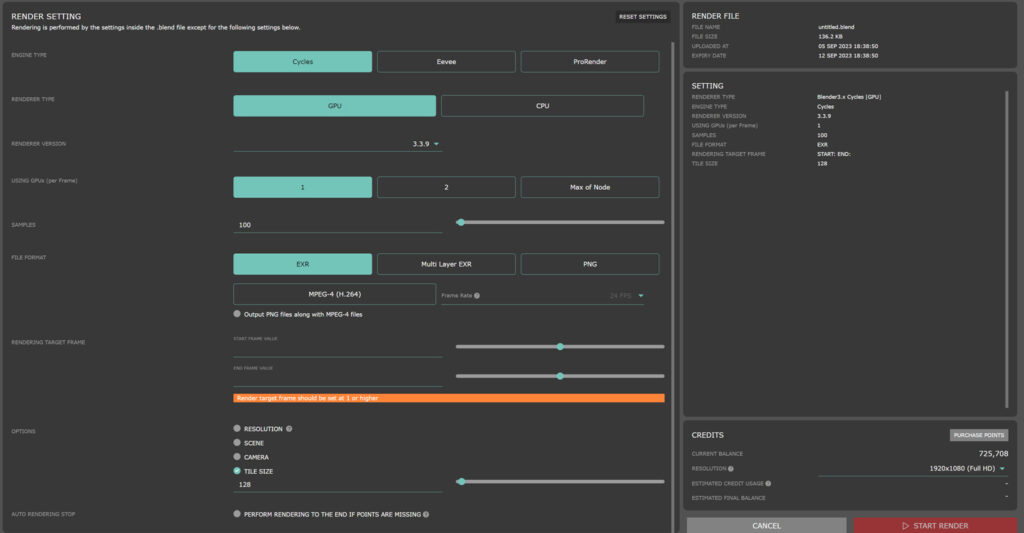
Set the rendering parameters and click Start Rendering.

For Blender Cycles, rendering uses the settings inside the .blend file, except for the following:

  • Render type
  • Samples
  • File format
  • Rendering target frame

■Estimating point usage

Resolution is only used to estimate the point usage and does not overwrite the .blend file settings.

*Parameters differ for ProRender and Blender Cycles.

3. Rendering

Set the rendering parameters and click Start Rendering.

Each frame is automatically distributed to servers in various locations.

4. Download the rendering results

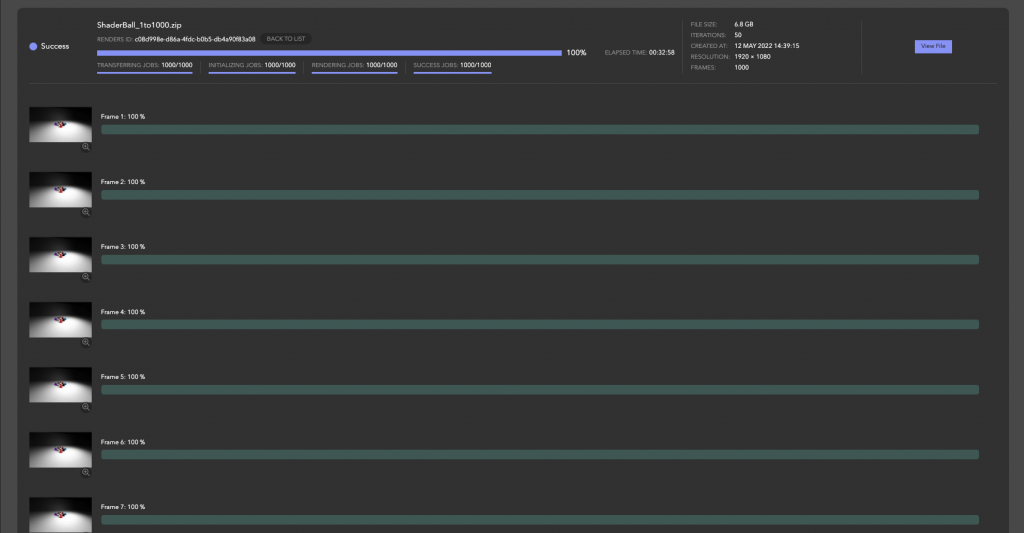
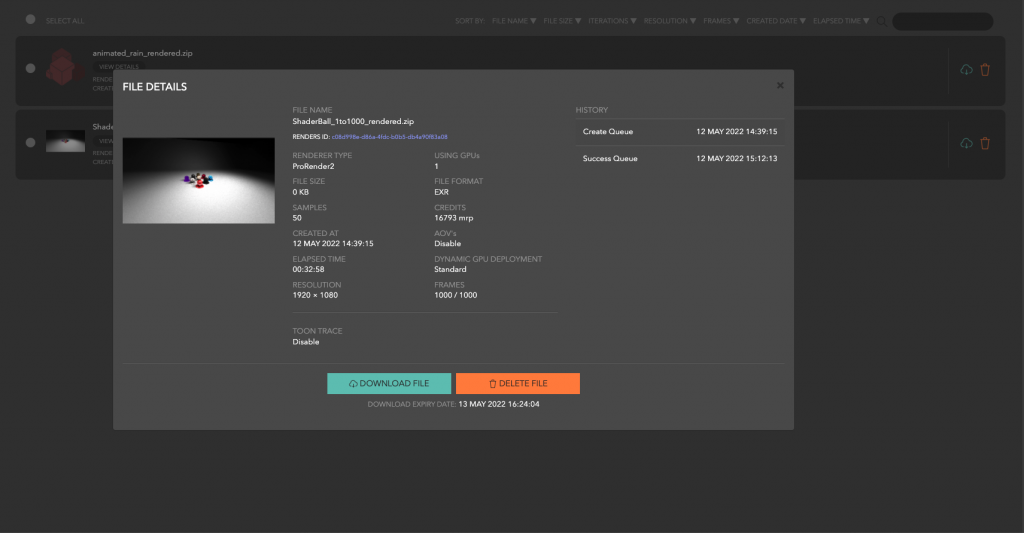
Click Rendered file in the menu to check the rendered data.
Download the rendered file from the download mark.
You can also download File Output node render pass from GENERATE AOVs .
Add a check for the AOV you want to download.

Preparation on Blender

1. Blender – Pack Resources

Blender allows you to put textures into blend files. You can add textures to your blend files by selecting File → External Data → Pack Resources.

When the resource is packed, you’ll see that the file size changed.
If you check the Shader editor, the icon should differ when the resource is not packed or packed.

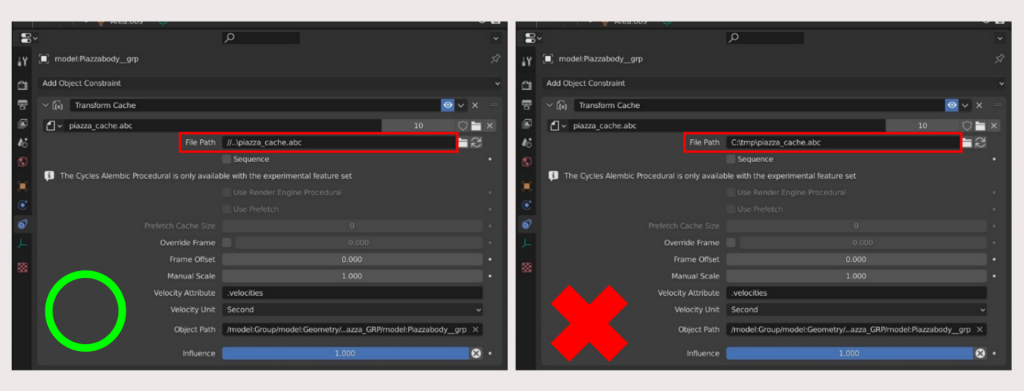
2. Blender – Relative Path

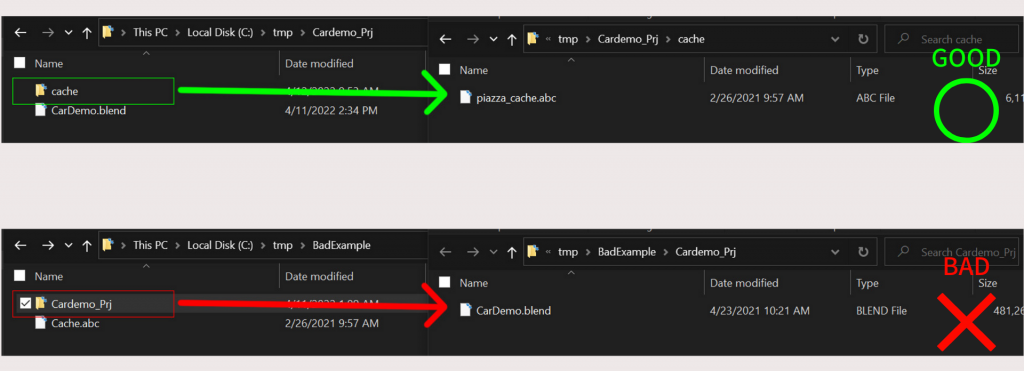
Cache files, Alembic, ImageSequence , and VDB cannot be put into the Blend file.
Put them after the folder in which Blend is located.

3. Set the newly transferred file path

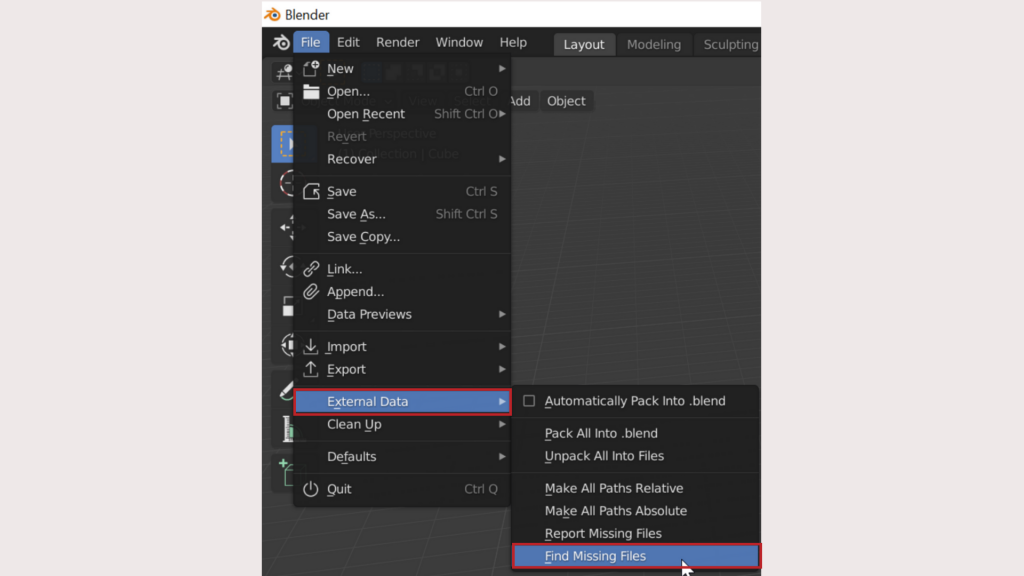
After transferring the data, set the newly transferred file path from File → External Data → Find Missing Files.

4. Set Make Paths Relative

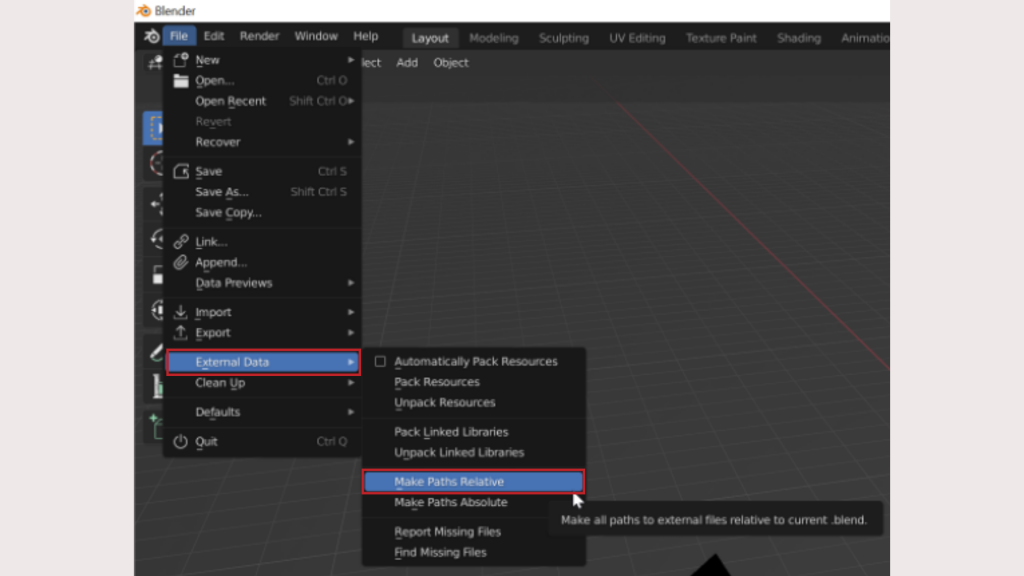
After moving the cache file, set File → External Data → Make Paths Relative.

If the file path starts with // instead of the hard disk name (C: \), the cache setting is complete.

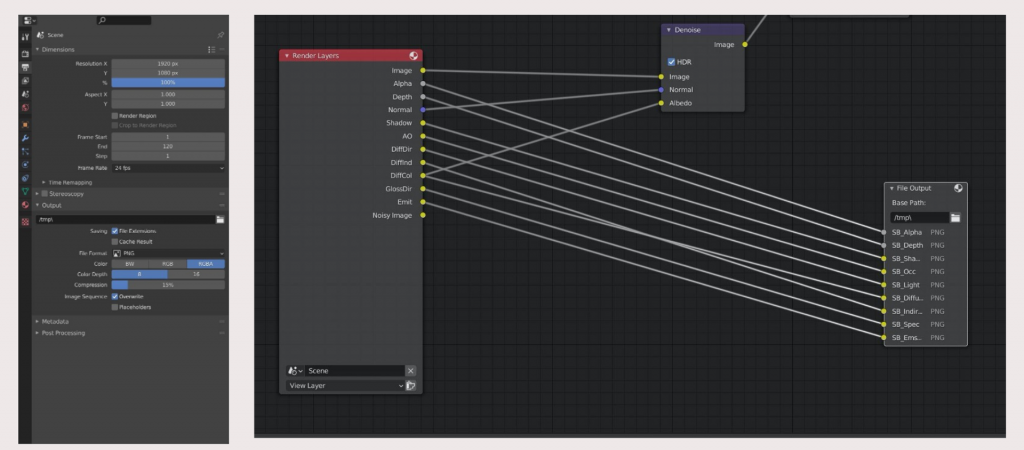
5. Blender – File Output

In Render Pool, the override of the render settings is the sample, export format, and target frame.
Set the resolution in the render settings and the Compositor and File Output for the render pass you want to export in the composer node .

6. Blender – Archive to .zip

After setting Cache , compress into a .zip file. Now you’re ready to upload to Render Pool.
If you don’t have cache or any file that cannot be packed into the .blend file, ignore this step and proceed to Render Pool.

Render Pool introduction video(PrePrender ver.)

GPU Rendering Service Render Pool From registration to file upload

Render Pool Demo Reel 2021

Collection of works rendered with Render Pool English version only