
How to Speed Up Rendering: Tips for Faster 3D Workflows
Rendering is one of the most exciting — and sometimes most frustrating — parts of the 3D creative process. Whether you’re working on an animation, a high-resolution still image, or a simulation-heavy sequence, rendering is the moment where all your hard work comes to life. But it can also bring your workstation to a standstill. Long render times can delay your pipeline, test your patience, and potentially hinder productivity. So, how can you speed up rendering without sacrificing quality or investing in an expensive hardware overhaul?
9 Proven Techniques to Speed Up Rendering
The good news is that improving your rendering times doesn’t require a Hollywood-level setup. With the right strategy and a few smart techniques, you can significantly reduce rendering durations while maintaining high-quality output. Here’s how.
Start with the End in Mind
Efficient rendering begins long before you press the render button. It starts with thoughtful planning. Ask yourself: What will the camera see in the final composition? Are there elements that can be simplified, hidden, or excluded altogether?
Many 3D artists build scenes filled with high-resolution textures and dense geometry, even for objects that appear in the background or are out of frame. Use lower-polygon models, reduce texture resolutions where appropriate, and hide or delete unseen geometry.
Quick Tips
- Remove unnecessary assets
- Simplify background elements
Optimize Geometry for Performance
Geometry is one of your worst enemies when it comes to extended rendering times. While detailed models can enhance realism, overloading your scene with millions of polygons can dramatically slow down your render engine. Consider using Level of Detail (LOD) models for background elements and baking high-resolution details into normal maps when appropriate.
Instancing is another valuable technique. Rather than creating multiple unique assets, use instances of the same object with minor variations in scale or rotation. For example, a forest scene can appear visually diverse with just a few instanced tree models, reducing memory and processing demands.
Quick Tips
- Reduce polygon count
- Bake details into normal maps
- Use instancing for repeated elements
Choose the Right Rendering Device
Most modern rendering engines offer support for both CPU and GPU rendering. In many cases, GPUs are capable of rendering frames much faster than CPUs, particularly when using engines like Octane, Redshift, Cycles (in GPU mode), or Arnold GPU.
If your system includes a capable graphics card, explore your software’s render settings to enable GPU acceleration. Some applications allow hybrid rendering, utilizing both CPU and GPU based on the task. Allocating rendering responsibilities strategically across devices can significantly improve performance and help you meet project deadlines more efficiently.
Quick Tips
- Use GPU-accelerated engines
- Enable hybrid rendering (CPU + GPU) if supported
Simplify Lighting and Ray Depth
Lighting plays a crucial role in both realism and rendering time. While physically accurate lighting setups — including soft shadows, global illumination, and multiple bounces — enhance visual fidelity, they can also be computationally expensive.
Try to light your scenes using a mix of techniques. Use baked lighting where possible, reduce the number of light bounces, and adjust ray depth settings to streamline calculations. Avoid enabling caustics or complex light interactions unless they are critical to the scene. Many professional artists use a combination of baked and real-time lighting to reduce rendering times without compromising quality.
Quick Tips
- Reduce light bounces and ray depth
- Use baked lighting where applicable
- Avoid unnecessary caustics and complex reflection
Use Denoisers to Reduce Sampling Needs
Noise is a common artifact in rendered images, often resulting from insufficient sampling. While increasing samples can reduce noise, it also increases render times. A more efficient approach is to use denoising tools.
Modern render engines offer great built-in denoising tools, such as OptiX, Intel Open Image Denoise, and AI-based denoising solutions. These allow you to render scenes with fewer samples while still achieving clean, high-quality results. In many cases, denoising can cut render times by 50 percent or more without negatively impacting the final output.
Quick Tips
- Lower sample counts with built-in denoisers
- Try OptiX, Intel OIDN, or AI-based solutions
Bake Simulations and Cache Effects
Simulations — such as smoke, fluids, particles, hair, or cloth — are often among the most resource-intensive elements of a scene. Attempting to render simulations on the fly can severely impact performance.
To improve efficiency, bake simulations before rendering. This includes physics simulations, particle effects, and procedural animations. Additionally, precomputing elements like lightmaps, shadows, or complex textures can reduce render times across multiple frames. Baked assets don’t require recalculation during each render pass, resulting in smoother workflows and faster output.
Quick Tips
- Bake simulations like smoke, cloth, and fluids
- Precompute lighting, shadows, and procedural textures
Render in Passes for Greater Control
Instead of trying to capture the perfect image all at once, break your scene down into logical chunks: background, foreground, characters, lighting, and effects. Render each pass separately, then combine them with post-compositing tools like Blender’s compositor, Nuke, or After Effects. If you decide to adjust lighting or depth of field, you only need to re-render those components. This modular approach saves time, optimizes resources, and enhances your creative control over the final result.
Quick Tips
- Split scenes into layers or passes
- Composite in post with tools like Blender, Nuke, or After Effects
Read More: Master Blender Render Settings for Stunning Results
Take Advantage of Cloud Rendering
Sometimes, the best way to speed up rendering is to stop doing it yourself. If your project is large, your deadline is tight, or your machine is too old to handle heavy workloads, there’s no shame in handing the job off to a professional rendering service.
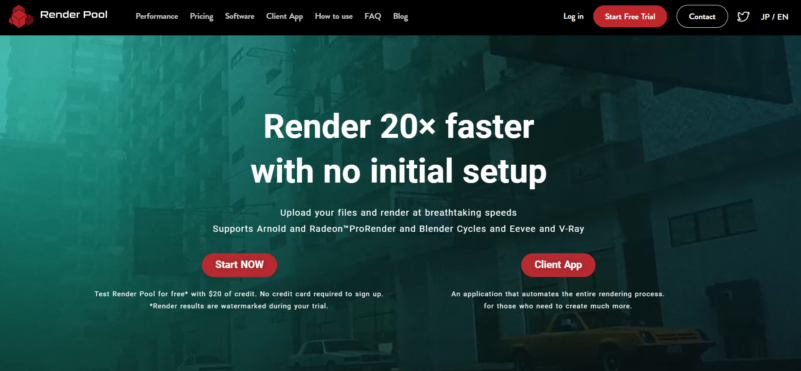
Services like Render Pool let you upload project files, configure render settings, and use powerful remote servers to process renders quickly and reliably. Its user-friendly platform is ideal for freelancers, small studios, and students. It eliminates the need for costly hardware, shortens render times, and frees up your local machine for other tasks. Whether you’re facing tight deadlines or working on a high-resolution animation, cloud rendering delivers speed, convenience, and scalability.
Quick Tips
- Offload heavy scenes to cloud rendering services like Render Pool
Update Drivers for Better Performance
While hardware often takes the spotlight, don’t overlook what version of software you’re using. Render engines, 3D software, and graphics cards are regularly updated, and newer versions often include optimizations, performance improvements, and even new features specifically designed to reduce render times.
Regularly updating your software stack is one of the simplest ways to maintain optimal rendering performance without changing your workflow.
Quick Tips
- Use the latest version of your render engine
- Update GPU drivers for performance improvements
Make Rendering Work for You
Speeding up rendering isn’t about compromising your vision. It’s about adjusting your process so that your creative energy is spent where it matters most. Rendering faster means getting to see your ideas realized sooner, iterating more freely, and not having to leave your machine running overnight just to hit a deadline. The tools are already in your hands — whether that’s GPU rendering, clever compositing, or simply trimming the fat from your scenes.
Once you start building speed into your workflow, rendering becomes less of a wall and more of a bridge. It’s the final stretch of the process, not the part where everything grinds to a halt. Use these tips, test what works best for your specific software and pipeline, and keep pushing forward, because time spent waiting is time you could be creating. And when you need a boost beyond what your local machine can handle, services like Render Pool are ready to help you finish faster without compromising quality.