
Substance Painter to Radeon ProRender: Workflow for Autodesk Maya and Blender
For many CG artists, 3D painting has become a standard element in workflows for creating textures in a 3D environment. As new renderers are released, there are export presets that have to be made on their own. Two years ago, CG artist Yohsuke Nakano made a workflow preset that works for Radeon ProRender for Maya, which was posted in the AMD Community. As it has since become outdated, he has created a new preset and asked Render Pool to help share it to the Maya and Blender communities.
In this article, we will be showing a workflow on how to get correct material results from Substance Painter to Radeon ProRender for Autodesk Maya and Blender.
Requirements and Software
The following are needed in order to used Substance Painter with Maya or Blender.
- SPtoRPR v3.4
- Radeon ProRender Plugin for Autodesk Maya or Blender
- Substance Painter 2020.2.2: PBR-based, high-quality texture creation software used commonly by CG Artists for films, games, and artwork.
- 3D computer graphics software
- Autodesk Maya (2018 – 2020): License-based CG software used by professionals and studios to create immersive creations.
- Blender (2.83 – 2.91): Open-source CG Software that supports entire 3D pipelines with no cost for licenses.
Step 1. Installing RPR Export Settings
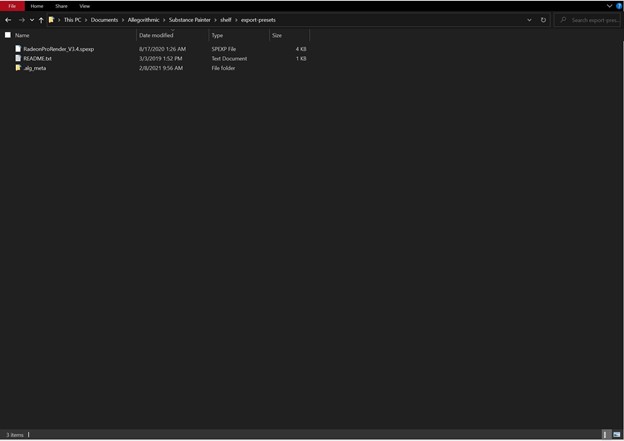
Download and install the export settings, and place them inside the following file path.
C:\Users\(Username)\Documents\Allegorithmic\Substance Painter\shelf\export-presets
This folder is a place where you can install or create custom export settings that you want to use in Substance Painter. You can also add downloaded materials and brushes to keep them organized.
Step 2. Export from Substance Painter
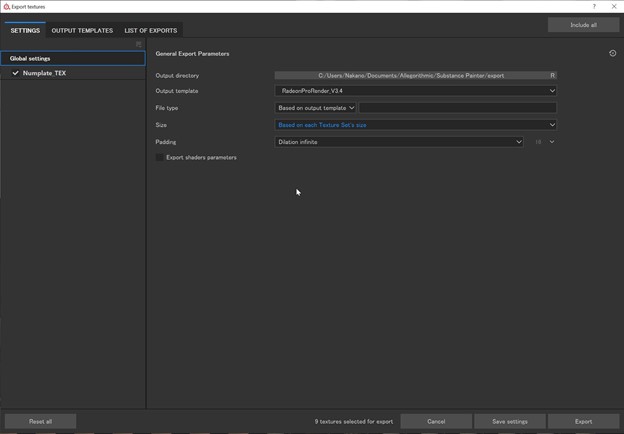
Once the installation is complete, you can check if the export preset is installed by opening
Substance Painter, then opening a scene file of the texture you would like to export to render with Radeon ProRender. Once the texture is ready to export, set your output template to RadeonProRender_V3.4 and click on the export button at the bottom right-hand corner.
Step 3. Shader Editor Setup
Once the textures are exported, copy them into your project folder and open your preferred software. Below, you will find methods and examples for both Autodesk Maya and Blender.
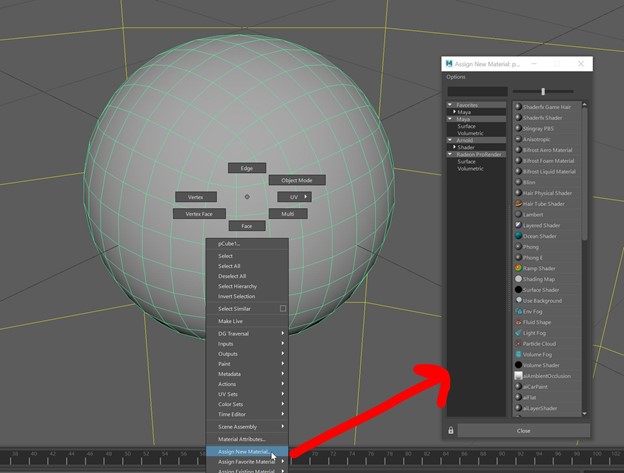
For Autodesk Maya Users
Open Hypergraph and create RPRUberMaterial to an object, or assign by right-clicking and selecting Assign New Material.
For Blender Users
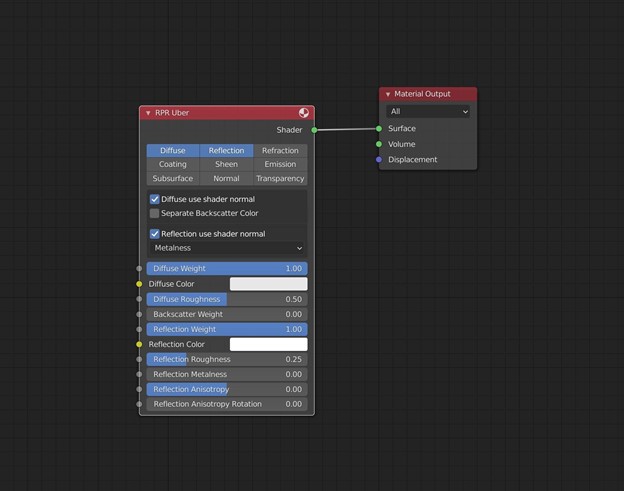
Open the Shader Editor, replace Principled BSDF, and assign RPR Uber to an object.
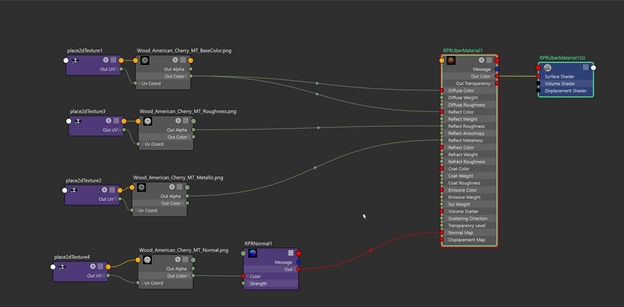
Step 4. Connect the Texture
Connect the texture as shown below in the Hypergraph (Maya) / Shader Editor (Blender). There is an optional export for height if you prefer using the texture as a bump/displacement map.
Drag and drop the texture inside the Hypergraph/Shader Editor and connect the nodes as shown in the images below.
Autodesk Maya Connections
| Texture Name | Out | Nodes | RPRUber Material |
|---|---|---|---|
| Base Color | Color | Base Color & Reflect Color | |
| Roughness | Alpha | Reflect Roughness | |
| Metallic | Alpha | Reflect Metalness | |
| Normal | Color | RPR Normal | Normal |
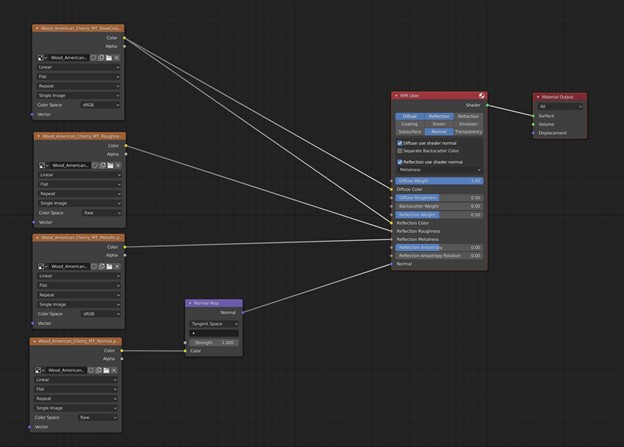
Blender Connections
| Texture Name | Out | Nodes | RPR Uber |
|---|---|---|---|
| Base Color | Color | Diffuse Color & Reflect Color | |
| Roughness | Color | Reflection Roughness | |
| Metallic | Color | Reflection Metalness | |
| Normal | Color | Normal Map | Normal |
Step 5: Color Space Setting
Inside the images node, you need to change the color space setting to have similar results to what you would get in Substance Painter Iray results. Roughness especially needs to have proper color management, or it will have a different reflection if it is set to SRGB. Make sure you have Color Management enabled in order to change Color Space.
Change the Color Space settings to the following.
| Texture Name | Color Space |
|---|---|
| Base Color | SRGB |
| Metallic | SRGB |
| Roughness | RAW |
| Normal | RAW |
| Height (Optional) | SRGB |
Step 6. Reflection Setting
The Reflection setting compared with Substance Painter and Radeon ProRender’s material (RPR Uber) have different behavior as the reflections are stronger in Radeon ProRender. They show different behaviors as they are different engines. Since the workflow changes with all renderers, this is one of the reasons why there are a lot of export settings for Substance Painter.
Metalness in Radeon ProRender is like putting layers on top while other renderers have a mixture of layers. So, most strong metallics such as Gold or Iron need full weight to cover up the material, but to create an accurate look from Substance Painter, change the reflection weight to 0.5. This gives a more accurate look compared to Substance Painter’s Iray. If you prefer the reflection weight as what you see, you can ignore this step.

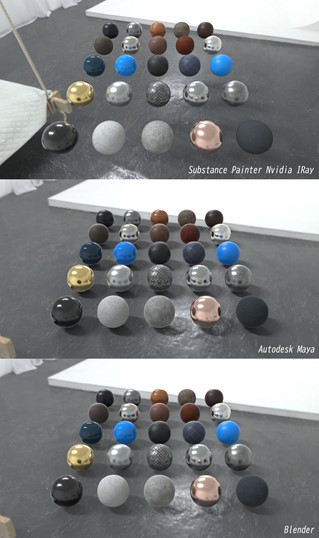
After following these steps, you should have results that resemble Iray renders in Substance Painter.
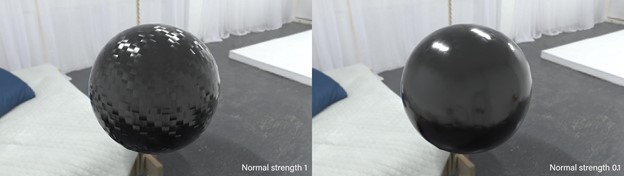
If you mix different types of textures during the process inside Substance Painter, lower the carbon fiber normals in Blender or Maya to get the result you are looking for.
Complex normals or heights, such as Carbon Fiber, require a bit more adjustment. In order to achieve the same look as Substance Painter, you need to change the Normal strength to 0.1.
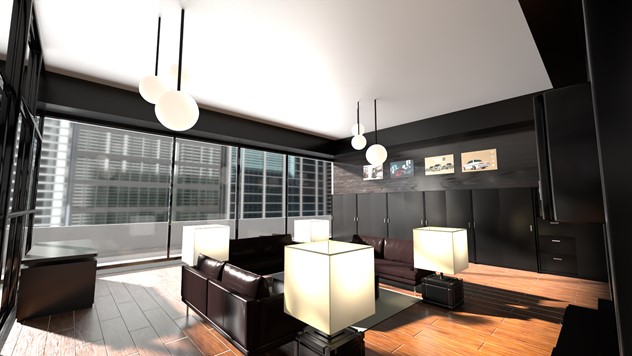
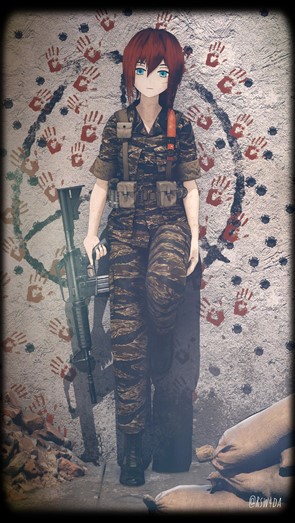
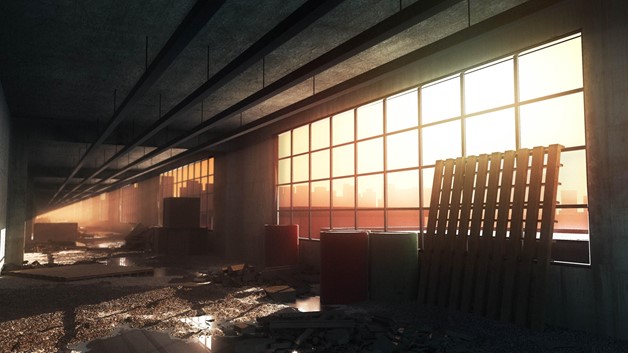
Example Works Rendered Using RPR with Textures Made in Substance Painter
The following scenes are by Yohsuke Nakano a.k.a. W4DA.

Bring Substance Painter to Your Maya or Blender Workflow
Depending on your renderer of choice, specific texture formats may change, so experimenting with formats by creating presets from scratch or researching materials are great solutions to help you make textures faster and optimize your workflow. You can also use Utility nodes that are in your software to create a material that matches the look you are after.
(A tutorial video further explaining this process will also be coming soon.)