Maya Rendering Guide for Realistic 3D Scenes
If you have ever worked in Autodesk Maya, you know that building a 3D scene is only part of the creative process. Modeling, texturing, animation, and lighting all play important roles, but none of those elements truly come together until you render the final image.
Whether you are creating cinematic animations, product visualizations, or visual effects, understanding how Maya rendering works is essential for producing professional-quality results. Keep reading to learn how rendering transforms a 3D scene into a polished final image and what techniques can help improve both quality and performance.
What Is Maya Rendering?
Rendering is the process of converting a 3D scene into a finished 2D image or animation. Maya takes all the information inside your project, including geometry, materials, textures, lighting, cameras, and visual effects, and calculates how every pixel should appear. The final result can be a still image, an animation sequence, or a collection of render passes prepared for compositing and post-production.
For beginners, Maya rendering can feel overwhelming at first. There are many settings to configure, unfamiliar technical terms to learn, and render times that can range from a few minutes to several hours, depending on scene complexity. However, once you understand the fundamentals, rendering becomes far less intimidating.
Why Rendering Is Important
A scene inside Maya is only a preview of your project. While viewport shading provides a rough representation of your work, it does not accurately display the final lighting, reflections, shadows, or material quality. Rendering transforms that preview into a polished final image.
This stage is where:
- Lighting creates mood, atmosphere, and depth
- Materials reveal realistic surface details
- Shadows add dimension and realism
- Reflections and refractions enhance surfaces
- Camera effects improve cinematic quality
- Global illumination produces natural lighting behavior
A strong render can make even a simple scene appear impressive and believable. On the other hand, poor rendering settings can make highly detailed models appear flat or unrealistic. Because of this, rendering is often considered one of the most important parts of the entire 3D workflow.
Arnold: Maya’s Built-In Renderer
Autodesk Maya includes Arnold, a professional production renderer widely used in film, television, advertising, and visual effects.
Arnold is known as a physically based renderer, meaning it simulates how light behaves in the real world. Rather than relying heavily on shortcuts or approximations, Arnold focuses on producing realistic lighting, shadows, and material interactions.
This approach provides several advantages:
- Natural-looking illumination
- Accurate reflections and shadows
- Realistic material behavior
- High-quality indirect lighting
- Consistent rendering results
For most Maya artists today, Arnold serves as the standard renderer for final production work.
Understanding Maya’s Rendering Process
When you start a render in Maya, the software performs a large number of calculations to determine how the final image should appear.
First, the renderer determines what the camera can see within the scene. It then traces rays of light as they interact with objects, materials, and surfaces. These rays bounce throughout the environment and calculate:
- Surface color
- Brightness
- Reflections
- Shadows
- Refractions
- Indirect lighting
Once these calculations are complete, the renderer combines all the information into a finished image. The more detailed your project becomes, the more calculations are required. This is why render times increase when scenes contain:
- High-resolution textures
- Complex geometry
- Volumetric effects
- Multiple light sources
- Glossy reflections
- Subsurface scattering
Preparing Your Scene for Rendering
Good rendering starts with proper scene preparation. Organizing your project before launching a final render can save significant time and prevent common issues later in production.
- Organize Your Scene: Keep geometry clean and remove unused objects, materials, and textures. Consistent naming conventions also make complex scenes easier to manage.
- Apply Materials and Textures: Assign realistic shaders and connect the necessary texture maps. Texture maps help surfaces appear more detailed and less uniform.
- Build the Lighting: Lighting has a major impact on the final quality of your render. Use area lights, skydome lights, or HDRI environments to create realistic illumination.
- Configure the Camera: Set up an effective composition and camera angle. Adjust the focal length and depth-of-field settings to improve cinematic realism.
- Adjust Render Settings: Choose the correct image resolution, file format, sampling quality, and output settings before starting a render.
- Run Test Renders: Instead of immediately rendering the entire frame, render smaller regions first to identify lighting issues, noise, or material problems.
Lighting: The Foundation of Realistic Rendering
Lighting is one of the most important elements in any render. Even simple objects can look highly realistic when paired with strong lighting. Maya includes several commonly used light types:
- Area lights
- Spotlights
- Directional lights
- Point lights
- Skydome lights
Skydome lights combined with HDRI images are especially popular because they provide realistic environmental lighting based on real-world photography.
When building lighting setups, focus on:
- Contrast
- Shadow softness
- Color temperature
- Light direction
- Exposure balance
Using Materials and Textures in Maya
Materials determine how objects respond to light inside a render. Arnold Standard Surface is the primary shader used in Maya and supports a wide variety of realistic material effects. Some of the most important controls include:
- Base color
- Roughness
- Specular reflection
- Metalness
- Transmission
- Subsurface scattering
Texture maps can then be added to these channels to create additional detail, variation, and realism. For example:
- Roughness maps help break up reflections
- Normal maps simulate surface detail
- Displacement maps create physical depth
- Specular maps control highlight intensity
Managing Render Quality and Noise
Noise is a common part of path-traced rendering. If your image appears grainy, the renderer usually needs additional samples to refine the final result. Increasing sample values improves image quality, but it also increases render time. A common workflow is to:
- Use low sample settings during previews
- Render small test regions
- Increase samples only for the final output
Arnold also includes adaptive sampling, which helps reduce render times by concentrating calculations only in noisy areas of the image.
CPU vs GPU Rendering
Arnold supports both CPU and GPU rendering, and each option offers different advantages.
CPU Rendering
CPU rendering is generally more stable and supports all Arnold features. Advantages include:
- Better support for large scenes
- Full compatibility with Arnold tools
- Reliable memory handling
GPU Rendering
GPU rendering is often significantly faster and works well for look development and previews. Advantages include:
- Faster rendering speeds
- Improved interactive rendering
- Efficient lighting previews
However, GPU rendering is limited by available VRAM and may not support all features of CPU rendering.
Rendering Animations in Maya
Rendering animations requires exporting every frame individually. Even short animations can contain hundreds or thousands of frames. For example, a 15-second animation rendered at 24 frames per second requires 360 individual images. If each frame takes only three minutes to render, the total render time exceeds 18 hours. This is why optimization and testing are extremely important before starting a final batch render.
Artists often reduce render times by:
- Lowering unnecessary subdivisions
- Optimizing textures
- Reducing light samples
- Cleaning unused assets
- Using render layers strategically
Render Passes and AOVs
Professional rendering workflows rarely rely on a single beauty render alone. Instead, artists generate multiple AOVs (Arbitrary Output Variables), also known as render passes. Common render passes include:
- Diffuse
- Specular
- Shadow
- Reflection
- Z-depth
- Cryptomatte
These passes provide greater flexibility during compositing in applications such as Adobe After Effects or Foundry Nuke. For example, compositors can adjust shadows, reflections, or atmospheric depth without needing to re-render the entire scene.
Using Render Farms for Maya Rendering
As projects become more complex, rendering locally on a single workstation may no longer be practical. Cloud render farms help solve this problem by distributing rendering tasks across multiple machines. This approach is especially useful for:
- Large animation projects
- Tight production deadlines
- High-resolution rendering
- Visual effects work
Render Pool is a cloud rendering service that supports Autodesk Arnold, making it a practical option for Maya artists working on animations, visual effects, and high-resolution scenes. The platform requires no complicated setup, allowing users to upload projects directly from a browser and begin rendering immediately.
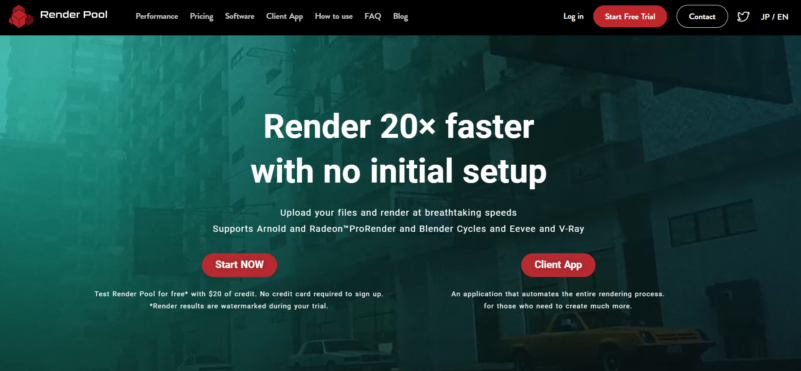
By distributing render jobs across high-performance cloud servers, Render Pool can reduce render times by up to 20 times faster compared to rendering on a local workstation. This also frees up local hardware for modeling, compositing, and other creative tasks. New users can test the service with a free trial that includes $20 in rendering credits.
Final Thoughts on Maya Rendering
Rendering is the final stage that transforms your Maya project into a polished visual presentation. It combines both technical knowledge and artistic decision-making.
At first, rendering may seem complicated, especially when projects render more slowly than expected or technical issues appear unexpectedly. However, with practice and experimentation, the process becomes much more intuitive. The more experience you gain with Maya rendering, the easier it becomes to predict how lighting, materials, and render settings will affect the final image.
And when projects become too demanding for your hardware, cloud rendering services like Render Pool can help accelerate production and keep your workflow moving efficiently. Ultimately, Maya rendering is what allows your ideas to move beyond the viewport and become finished visuals that audiences can experience and appreciate.