How to Adjust Settings in Radeon ProRender’s Effects Tab in Maya
Settings in the Effects tab defines whether additional processing or effects need to be applied to the rendered output.
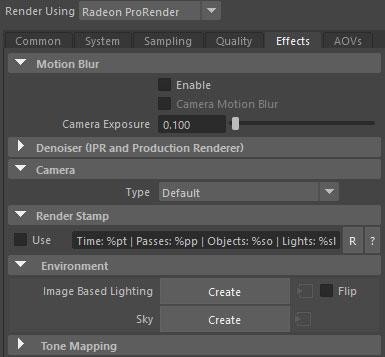
Motion Blur
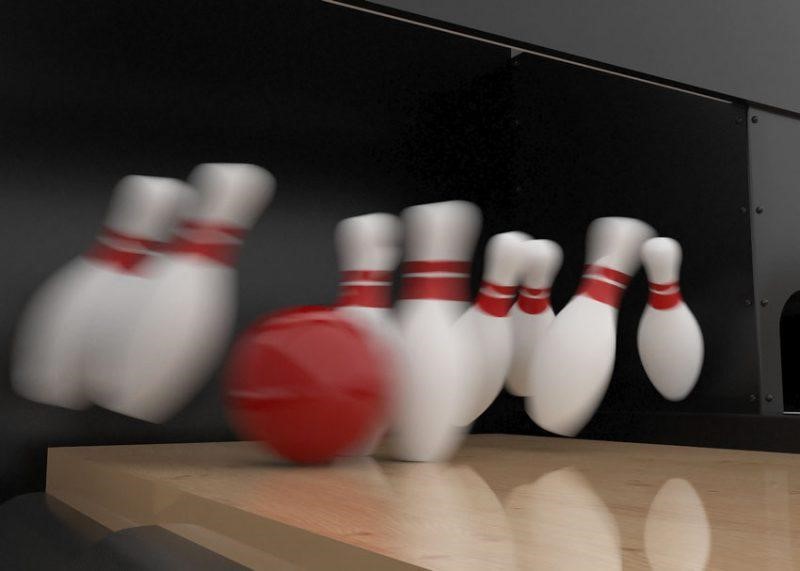
Motion blur is the effect caused by moving objects in a regular photo during the exposure time of the camera. Fast object or camera speeds, or long exposures, can create a “blurring” effect on objects in the image.
AMD Radeon ProRender lets you simulate animated motion blur effects.
By default, animated scenes are rendered as a series of still images that do not convey the sense of speed of fast-moving objects. With motion blur, objects appear solid in the direction of motion, making them more realistic, especially when you are playing an animation.
Motion blur is applied to the deformation (movement) of objects and is not supported for deformation animation, camera animation, and particle animation.
Enable
By checking the Enable option, motion blur will be enabled for the scene.
Camera Motion Blur
When Camera Motion Blur is enabled, this option applies motion blur to the movement of the camera.
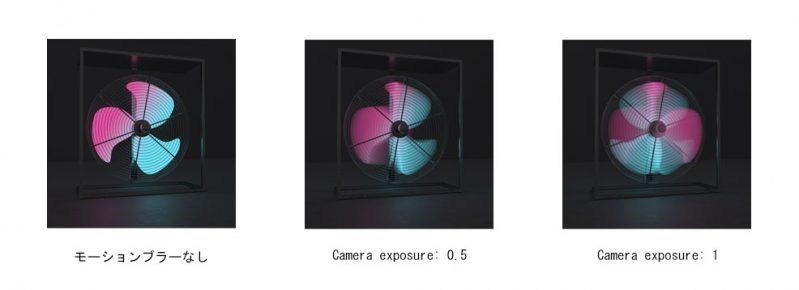
Camera Exposure
Increasing the values of Camera Exposure will emphasize motion blur and produce longer blur tracks that simulate speed. Lowering the values will increase the sharpness of the image, making the blur effect less noticeable. Setting the Camera Exposure value to 0 will turn off the blur effect completely, allowing for rendering without any motion tracing.
Motion blur can be calculated in both the final render and the viewport. To enable motion blur in the viewport, go to Render Settings > System > Other Settings and select the Viewport Motion Blur option.
Note: Increasing the exposure value of the camera increases the blur but also increases the noise. You may need to increase the number of samples to reduce the amount of noise in blurred areas.
Denoiser
Rendering complex scenes often takes an exceptionally long time to denoise. A common way to reduce noise is to adjust the quality settings as well as the number of iterations (samples) meant for rendering. However, depending on the complexity of the scene and the effects used, it may take longer for the image processing to converge. An alternative solution for removing noise is to use a denoiser.
The Denoiser has a filtering function that detects noisy pixels and reconstructs the colors. All filters come with pre-tested and tested presets so you don’t have to set them up from scratch.
Note: The Denoiser setting can reduce the number of samples and render time, but it doesn’t solve everything. Whether or not you use the denoiser and which filter you choose is almost always project dependent. Also, keep in mind that the larger the number of samples, the better the denoising performance.
Enable
Checking Enable will activate the denoiser for both the final render and the viewport render.
Denoiser Filter Types
You can select among the following available denoiser types.
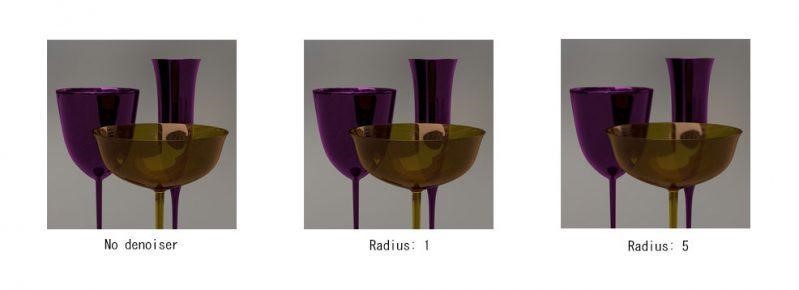
Bilateral
Bilateral is a denoising filter that blends adjacent pixels while maintaining sharp edges.
It works by replacing each pixel with a weighted average of its neighbors. The weighted average is calculated based on factors like pixel color similarity, spatial proximity, and normal difference. This ensures that only similar pixels contribute to the resulting color, resulting in high-quality smoothing without blurring the outline of the object.
From a time and computational resource standpoint, it is the least resource consuming denoising filter.
Radius
Radius controls the area where similar neighboring pixels are found. Area Radius can be defined in pixels and supports values from 1 to 50.
The higher the value, the wider the pixel comparison area and the blurrier and smoother the effect, but it requires more resources and time to calculate the pixel color.
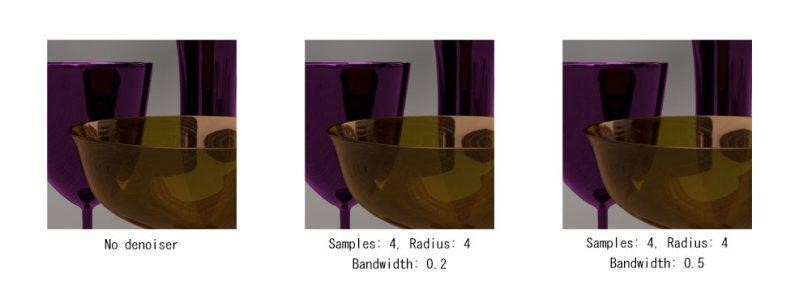
Local Weighted Regression (LWR)
Local Weighted Regression (LWR) is a denoising filter based on a local regression model. Denoising is done by taking the pixel coefficients in a small (local) window and reconstructing the pixel color. The bandwidth parameter is used to preserve the contrasting edges.
- Samples: The number of samples (number of iterations) to determine the color of each pixel is defined. The higher the value, the better the result, but it takes longer to remove noise.
- Filter Radius: Controls the area or window within which similar neighbors are found. This parameter defines the area radius in pixels and supports values from 1 to 10. The higher the value, the larger the sampling area to determine the pixel color. The result is better, but it requires more resources and time.
- Bandwidth: Controls the filter bandwidth (i.e., how much data is used to calculate the pixel color). Smaller values result in less noise but can lose image detail.
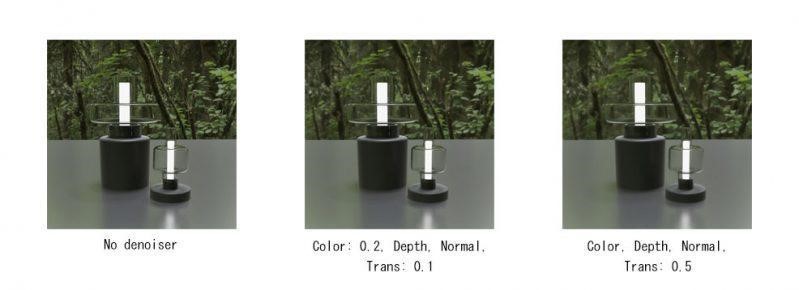
Edge Avoiding Wavelets (EAW)
Edge-stop wavelet is a noise reduction filter based on A-Trous wavelet denoiser.
- Color: Defines a threshold for detecting the color difference between a pixel and its neighbors. This parameter supports values from 0.1 (default) to 1. Smaller values blend the pixels in a very similar color and retain the edges better, but have more noise artifacts. Higher values increase the color difference and force denoising, but smooth edges and bleed colors.
- Normals: Defines the threshold for detecting differences between surface normals. This parameter supports values from 0.1 (default) to 1. Smaller values better detect mesh irregularities and preserve geometric details in difficult areas such as corners and edges. The higher the value, the greater the difference, but you may lose finer geometric details.
- Depth: Defines a threshold for detecting Z depth differences. This parameter supports values from 0.1 (default) to 1. Smaller values preserve the edges but make the image noisier.
- Trans: Defines transmission similarities. This parameter supports values from 0.1 (default) to 1. This factor can be considered as the transmission threshold for boundary detection. The smaller the coefficient, the better the boundaries are preserved, but the noise level increases.
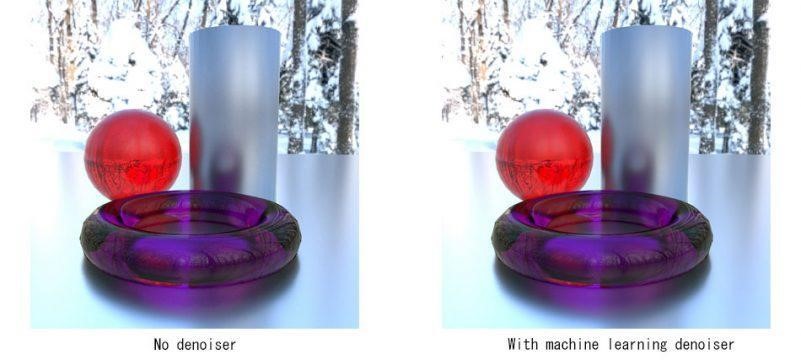
Machine Learning
Machine learning is an AI filter trained on a large dataset that uses deep machine learning to remove noise from rendered images.
- Color Only: The Color Only option is a simple noise reduction model. The simplified model considers only color inputs and ignores all other inputs such as normals, depths, albedos, and so on. Choosing this option is useful if you see defects or distortions in the color of the denoised image. It also requires less memory and is faster.
- Color + AOVs: The Color + AOVs option takes into account denoising not only color, but additional inputs as well. In some scenes, the additional information gives better results.
- Limitations: A Windows OS is required to run the machine learning filter on the GPU. For other OS, noise reduction switches to CPU-based mode.
Camera
ProRender comes with a number of camera types that let you control how objects in your scene appear in the viewport and final render.
Camera Types
- Spherical Panorama: You can render a 360-degree panoramic image.
- Spherical Panorama Stereo: You can render a 360-degree stereo panoramic image with left and right parallax.
- Cube Map: You can render a cube map divided into six squares in each direction (top/bottom/left/right/front/back).
- Cube Map Stereo: You can render a cube map with left and right parallax.
Render Stamp
The render stamp is a text string that appears in the lower right corner of the rendered image. It includes reference information that you may find useful, such as the time it took to complete the rendering process and the hardware device used.
Rendering stamps are not displayed by default. To display the stamp on the rendered image, select the Use check box and specify the text string you wish to include. Click the R next to the stamp field to reset the render stamp to its default value.
ProRender also allows you to include arbitrary text in your render stamp. To make the stamp more descriptive and informative, you can use the following variables (starting with a % sign). Use any of the following next to the stamp field to see a prompt for variables that can be used in the render stamp.
| %pt | Performance time (time it takes to render the image) |
| %pp | Performance sample |
| %sl | Number of lights in the scene |
| %so | Number of objects in the scene |
| %i | Computer name |
| %c | CPU used for rendering |
| %g | GPU used for rendering |
| %h | Hardware used for rendering |
| %r | Rendering mode (CPU, GPU, CPU + GPU) |
| %d | Rendering date and time |
| %b | AMD Radeon ProRender (installed version number) |
Tone Mapping
Tone mapping is a technique used in image processing and computer graphics to map one set of colors to another to approximate the look of HDR images in media with more limited dynamic range.
Tone Mapping Types
Linear
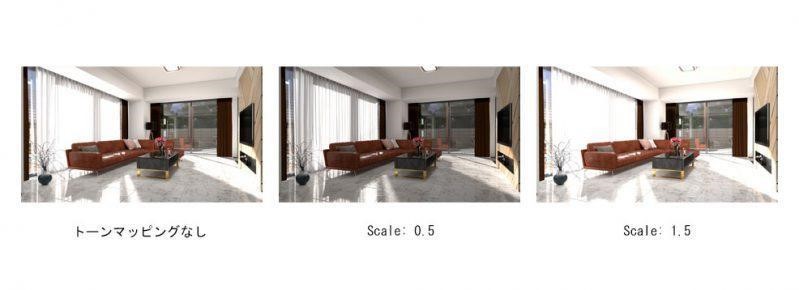
Scale
You can adjust the brightness of the scene by increasing or decreasing the Scale value.
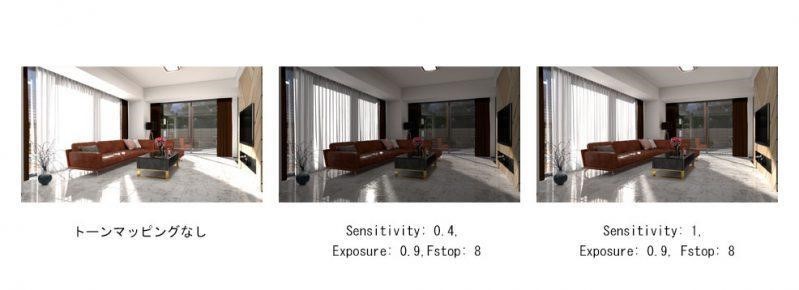
Photolinear
Photolinear is based on actual camera settings.
- Sensitivity is the amount of light incident on the image.
- Exposure controls how long the shutter is open to let in light.
- F-stop is the aperture width according to normal camera settings. The smaller the value, the wider the aperture and the more light that passes through the film.
Auto Linear
Auto Linear is a photo tone mapper that uses default camera characteristics and average image brightness.
Max White
Max White determines the brightest pixel in the image and sets it to white. The remaining pixels in the image are scaled to fit this brightest pixel. This operator works best on images with limited contrast. If there are very light areas in the image, the rest will appear very dark or black.
Reinhard02
Reinhard02 aims to match the high dynamic range of real-world lighting to the screen, based on the tone mapping technology commonly used in photography.
- Pre Scale affects the brightness of dark areas such as shadows.
- Post Scale controls the final brightness of the image after it has been tone mapped.
- Burn is used to adjust the brightness of highlights in an image based on dark areas.
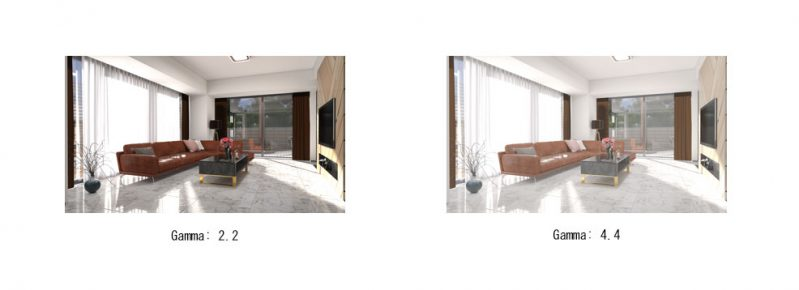
Apply Gamma to Maya Views
Apply Gamma to Maya Views controls whether gamma settings are applied to convert colors in the render settings.
Note: We recommend that you set View Transform to Raw or disable it with this option enabled. Otherwise, the color will be converted twice (by ProRender and Maya) and will not display properly.
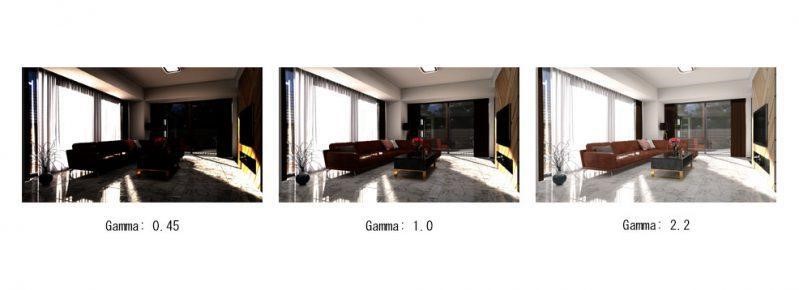
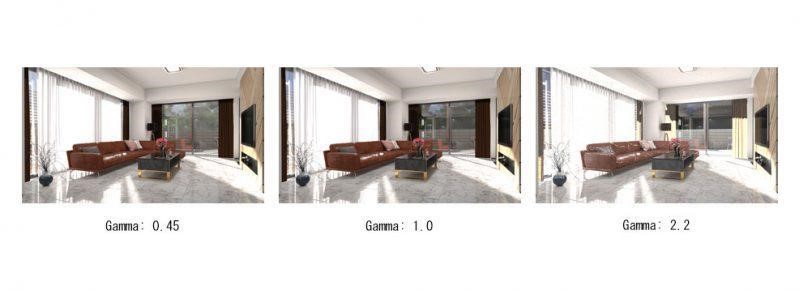
Compare the two images below. A gamma of 2.2 is applied once to the first image and the same gamma value is applied twice to the second image.
Always enable this option to apply the color management settings to the output produced by batch render. If this option is disabled, batch render will output Raw images (no color management applied).
Display Gamma
The Display Gamma parameters allow you to apply gamma correction to the output image so it will display properly on your monitor. The default gamma correction value is 2.2. A value of 1 means the gamma is uncorrected.
Texture Gamma
Texture Gamma is used to correct the gamma value of a texture that has already been pre-applied with gamma correction. In this case, you can use the reciprocal of gamma as the texture gamma value to de-gamma the texture before shading so it doesn’t look strange in the final render.
This parameter applies to all textures in the scene. A value of 1 means the gamma is not modified for textures (textures are in linear color space).
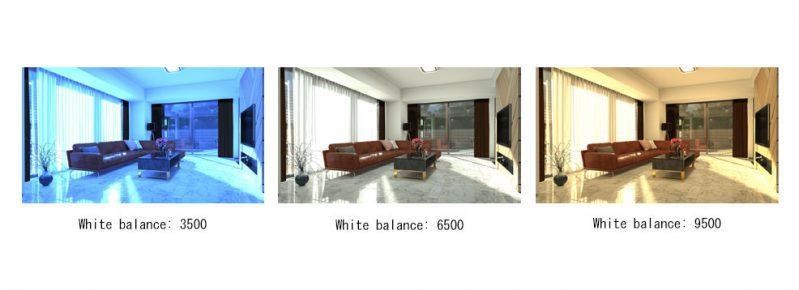
White Balance
You can set the color temperature of the light in the image according to the basic settings of the digital camera. Supported values are 1,000 (cold blue shades) to 12,000 (warm red shades). A value of 6,500 is considered the whitest point.