
Cloud Rendering: Optimize Your 3D Animation Workflow
Over the years, digital creators have significantly evolved the way they work, particularly when producing high-quality images, animations, and special effects. One game-changing tool that has revolutionized the creative process is cloud rendering.
In the past, rendering was typically done using local machines. Larger studios might have invested in render farms, but these setups were expensive to maintain and consumed significant amounts of energy — not exactly feasible for smaller teams or independent creators. Today, cloud rendering offers an accessible, efficient, and cost-effective alternative, allowing creators of all sizes to harness powerful remote servers for their rendering needs.
Keep reading to discover more about how cloud rendering works and why it’s revolutionizing the way creators bring their ideas to life.
What Is Cloud Rendering?
Imagine you’ve spent weeks — or even months — working on a complex 3D project. You’ve meticulously built your models, textures, lighting, and effects. Now it’s time for the final step: rendering everything into polished, high-quality images or videos. The problem? Rendering these visuals can be incredibly time-consuming, often taking hours, days, or weeks.
Enter cloud rendering. Instead of relying on local machines, you upload your project files to a network of remote servers, which take care of the rendering process for you. Once completed, the final product is sent back to you ready to use.
Why Is Cloud Rendering a Game-Changer?
Cloud rendering has gained traction for several compelling reasons.
Cost Efficiency
Traditional rendering setups require expensive, high-performance hardware. The upfront costs and ongoing maintenance make this option impractical for smaller studios and individual creators. Cloud rendering, on the other hand, typically operates on a variety of payment plans, including pay-as-you-go models. You only pay for the resources you use, whether for a small project requiring minimal rendering or a large-scale production needing extensive resources.
Faster Turnaround Times
Anyone who’s waited endlessly for a render to finish on their local machine knows how frustrating the process can be. With cloud rendering, the workload is distributed across multiple servers in a network. This parallel processing significantly cuts down rendering times, making it possible to meet tight deadlines or quickly iterate on creative ideas.
Scalability and Flexibility
One of the most appealing aspects of cloud rendering is its scalability. If you’re working on a massive project, you can efficiently allocate more servers to handle the increased workload. Conversely, you can scale back for smaller projects and avoid unnecessary costs. This flexibility ensures you’re only using the resources you truly need.
Access to Cutting-Edge Technology
Cloud rendering services utilize state-of-the-art hardware, including powerful GPUs designed for handling complex rendering tasks. For smaller studios and independent creators, accessing such advanced technology would otherwise be prohibitively expensive. Cloud rendering democratizes the playing field, offering everyone access to top-tier equipment without the financial burden.
Industries Benefiting from Cloud Rendering
Cloud rendering has proven to be a valuable asset across a variety of industries.
Film and Animation
The film and animation industries were some of the first to adopt cloud rendering on a large scale. Big-budget productions often require immense rendering power to create intricate environments, lifelike characters, and dazzling special effects. By leveraging the cloud, studios can significantly reduce rendering times, ensuring they meet deadlines without compromising quality.
Video Game Development
Game developers rely on high-quality models, textures, and lighting to create immersive gaming experiences. Cloud rendering accelerates the creation of these assets, enabling faster workflows and reducing production costs.
Architecture and Design
Architects and designers use cloud rendering to generate photorealistic 3D models of their projects. These high-quality visuals help clients better understand designs and make more informed decisions. The speed and efficiency of cloud rendering streamline the entire process, from concept to presentation.
Choosing the Right Cloud Rendering Platform
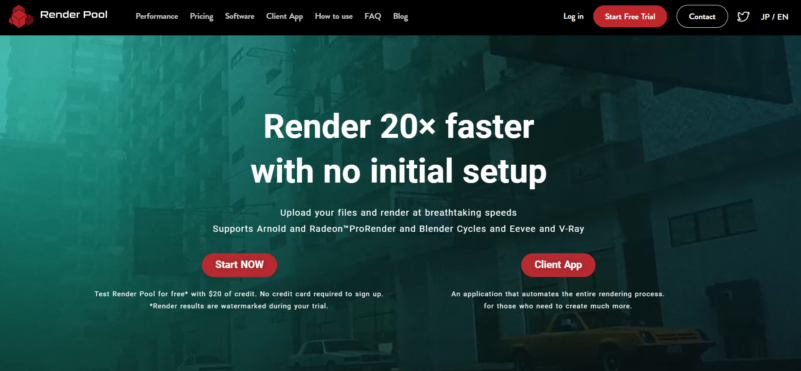
When it comes to cloud rendering, selecting the right platform can make all the difference. One standout option is Render Pool, a cloud platform designed to provide intuitive and affordable access to powerful rendering technology. Render Pool eliminates the need to manage your own render farm, making it an excellent choice for creators seeking efficiency and cost-effectiveness. Additionally, Render Pool offers:
- Lightning-Fast Rendering: Reduce rendering times by up to 2,000%. A project that takes days on a local PC can be completed in just a few hours using Render Pool’s 1,000+ servers.
- Hassle-Free Setup: No downloads, installations, or complex configurations are needed. Simply upload your files and start rendering from your browser in minutes.
- Multi-Renderer Compatibility: Leading render engines are supported, like Blender Cycles and Eevee, Autodesk Arnold, Chaos V-Ray, and Radeon ProRender.
- Flexible Pricing Options: Choose between a pay-as-you-go plan starting at $0.03 per GPU minute or an Unlimited Plan for $140/month that is perfect for large-scale projects and frequent users.
- Enhanced Creative Freedom: Offload heavy rendering tasks to the cloud, freeing your local workstation for other creative workflows and improving overall efficiency.
- Proven Results Worldwide: Join over 16,000 creators in 90+ countries who have saved thousands of hours on their rendering projects. Start with a free $20 trial — no credit card required.
How Cloud Rendering is Revolutionizing the Creative Process
Cloud rendering has transformed the creative process across industries by providing a faster, more efficient way to render high-quality visuals. By leveraging remote servers equipped with cutting-edge hardware, creators can offload heavy rendering tasks and reduce reliance on costly local machines. This technology saves time and offers unparalleled scalability, flexibility, and access to top-tier resources, making it a game-changer for professionals in film, animation, video game development, architecture, and more.
In a world where time and efficiency are key to creative success, Render Pool empowers creators to achieve more in less time. Whether you’re a filmmaker, game developer, or architect, Render Pool provides the speed, flexibility, and cost-effectiveness you need to bring your ideas to life. Experience the future of rendering today — sign up for Render Pool and take advantage of a free $20 trial to see how cloud rendering can revolutionize your workflow.